
Making bread at home can seem daunting, but let me tell you, with this quick and easy air fryer bread recipe, you’ll wonder why you didn’t try it sooner! I absolutely love how simple it is to whip up a warm loaf of fresh bread without the fuss of traditional baking. Seriously, in just 35 minutes, you can have a delicious, golden-brown loaf ready to enjoy. The best part? You only need a handful of ingredients that you likely already have in your pantry. Trust me, once you try this method, you’ll be hooked on making bread in your air fryer. It’s a game-changer!
Ingredients List
- 2 cups all-purpose flour
- 1 tablespoon sugar
- 1 teaspoon salt
- 1 tablespoon baking powder
- 1 cup water
How to Prepare Bread in the Air Fryer
Now that you have your ingredients ready, let’s dive into the fun part—making your delicious air fryer bread! The process is straightforward, and I’ll guide you through each step, so you’ll feel like a pro in no time. Just follow along, and don’t hesitate to ask questions if you get stuck!
Step 1: Preheat the Air Fryer
First things first, you’ll want to preheat your air fryer to 350°F (175°C). Preheating is crucial because it helps create that lovely golden crust we all crave. Usually, this takes about 3-5 minutes, and you can use this time to mix your dry ingredients. Don’t skip this step—trust me, it makes a difference!
Step 2: Mix the Dry Ingredients
In a big mixing bowl, combine 2 cups of all-purpose flour, 1 tablespoon of sugar, 1 teaspoon of salt, and 1 tablespoon of baking powder. I like to stir them together with a whisk or fork to make sure everything’s nicely blended. This helps the baking powder distribute evenly, which is key for a good rise. Plus, it’s super satisfying to see those dry ingredients come together!
Step 3: Form the Dough
Next, it’s time to add in 1 cup of water. Pour it into your dry mixture and start stirring. You want to mix until a dough begins to form. The dough should be slightly sticky but not wet. If it’s too dry, feel free to add a splash more water, but be careful not to overdo it! You’re looking for that perfect dough consistency that you can shape without it sticking all over your hands.
Step 4: Shape the Loaf
Now for the fun part—shaping the loaf! Dust your hands with a little flour to prevent sticking, then gently knead the dough a few times in the bowl. Shape it into a loaf that fits snugly in your air fryer basket. Don’t worry if it’s not perfect; the beauty of homemade bread is in its unique shape! Just make sure it’s even so it cooks uniformly.
Step 5: Cook in the Air Fryer
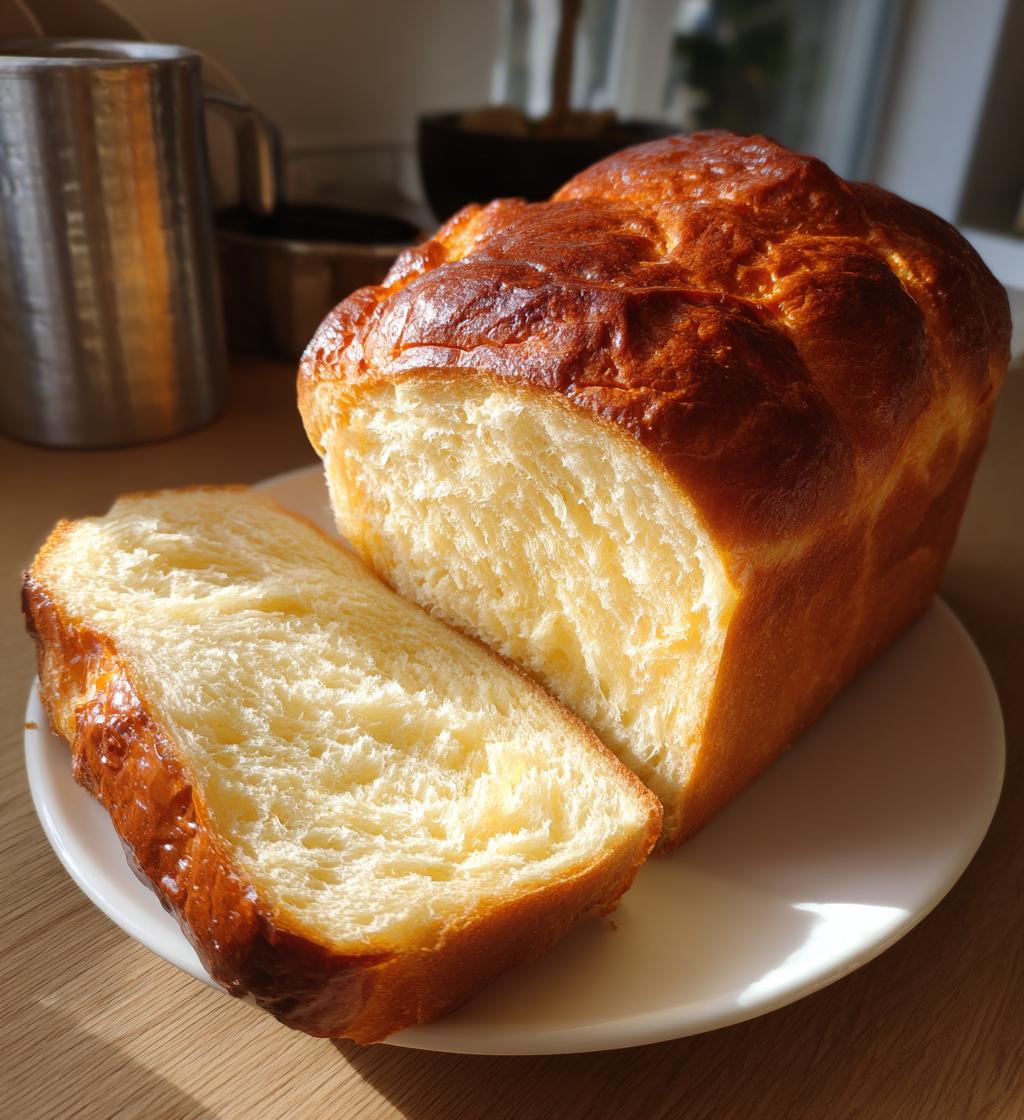
Time to cook! Carefully place your shaped loaf in the air fryer basket. Make sure there’s some space around it for the air to circulate—this helps it bake evenly. Cook it for about 25 minutes. You’ll know it’s done when it’s beautifully golden brown and sounds hollow when you tap the bottom. If you’re unsure, you can use a toothpick; it should come out clean!
Step 6: Cooling and Slicing
Once your bread is out of the air fryer, let it cool for a few minutes in the basket. This helps it firm up a bit. After that, transfer it to a wire rack or cutting board to cool completely. When you’re ready to slice, use a serrated knife for clean cuts. I find that waiting a little while before slicing allows the flavors to settle and the texture to perfect. But hey, if you can’t wait, I totally understand—warm bread is irresistible!
Why You’ll Love This Recipe
- Quick preparation—ready in just 35 minutes!
- Minimal ingredients needed, making it budget-friendly and easy to whip up.
- Deliciously soft and fluffy texture that rivals traditional bread.
- Golden-brown crust that’s perfectly crisp thanks to the air fryer.
- Great for beginners—no fancy equipment or techniques required!
- Versatile base for adding your favorite herbs, spices, or even cheese.
- Perfect for sandwiches, toast, or simply enjoying with butter.
- Less mess—no need for a countertop cluttered with flour and dough!
Tips for Success
To make sure your air fryer bread turns out just right, here are some handy tips I’ve gathered from my own adventures in baking! Trust me, these little nuggets of wisdom can make a big difference.
- Don’t skip the preheating! This step is crucial for getting that golden crust. If your air fryer isn’t hot enough, the bread won’t rise as nicely.
- Watch the dough consistency: If your dough feels too sticky, add a sprinkle of flour until it’s manageable. But be careful not to add too much—aim for that perfect balance!
- Keep an eye on the cooking time: Air fryers can vary in strength. Check your bread a few minutes before the 25-minute mark to avoid overcooking. You want it golden, not burnt!
- Experiment with flavors: Feel free to mix in herbs, garlic powder, or even shredded cheese to elevate the taste. It adds a wonderful twist that makes your bread even more special.
- If it doesn’t rise as expected: It could be that your baking powder is old. Always check the expiration date for the best results!
- Store properly: If you have leftovers, wrap your bread tightly in plastic wrap or store it in an airtight container to keep it fresh. It’s best enjoyed within a couple of days!
With these tips in your back pocket, you’ll be well on your way to mastering air fryer bread like a pro! Enjoy the process, and don’t be afraid to get a little creative!
Nutritional Information
Let’s chat about the nutritional breakdown of this delightful air fryer bread! Keep in mind that these values are estimates and can vary based on the specific ingredients you use. Here’s what you can expect per slice:
- Calories: 120
- Fat: 1g
- Saturated Fat: 0g
- Unsaturated Fat: 0g
- Trans Fat: 0g
- Carbohydrates: 24g
- Fiber: 1g
- Protein: 3g
- Sugar: 1g
- Sodium: 200mg
- Cholesterol: 0mg
This bread is not only quick and easy to make, but it’s also a charming addition to your meals, providing a nice balance of carbs and protein to keep you fueled. Enjoy your homemade bread without the guilt!
FAQ Section
Got questions? No worries! I’ve got you covered with some common queries about making bread in the air fryer. Let’s dive in!
Can I use whole wheat flour instead of all-purpose flour?
Absolutely! Whole wheat flour can give your bread a lovely nutty flavor and extra fiber. Just keep in mind that it may make the bread a bit denser, so you might need to adjust the water slightly to get the right consistency.
How do I know when my bread is done?
Great question! Your air fryer bread should be golden brown on the outside and sound hollow when tapped on the bottom. If you want to be extra sure, a toothpick inserted in the center should come out clean. Trust your instincts; you’ll get the hang of it!
Can I add herbs or spices to the dough?
You bet! Adding herbs like rosemary, thyme, or spices like garlic powder can elevate the flavor of your bread. Just mix them into the dry ingredients for an extra tasty twist!
What if my dough is too sticky?
If your dough feels too sticky, don’t panic! Just sprinkle a little more flour into the mix and knead gently until you reach a manageable consistency. It’s all about finding that sweet spot!
Can I make this bread without an air fryer?
While this recipe is designed for the air fryer, you can definitely bake it in a traditional oven! Just preheat your oven to 350°F (175°C) and bake for about 30-35 minutes, or until it’s golden brown. You might need to adjust the time based on your oven, so keep an eye on it!
Storage & Reheating Instructions
Once you’ve baked your delicious air fryer bread, you’ll want to keep it fresh for as long as possible! Here’s how to store any leftovers and enjoy them later.
First off, to store your bread, let it cool completely on a wire rack. This step is super important because it prevents moisture from building up, which can make the bread soggy. Once it’s cool, wrap it tightly in plastic wrap or place it in an airtight container. This way, it’ll stay fresh and delicious for up to 2-3 days at room temperature. If you know you won’t finish it in that time, I recommend freezing it!
To freeze, slice the bread (if you like) and wrap each slice individually in plastic wrap, then place them in a freezer-safe bag. This makes it super easy to grab a slice whenever you want some fresh bread! Your air fryer bread can be frozen for up to 2 months.
When you’re ready to enjoy your bread again, simply take out a slice or two, and let them thaw at room temperature for about 15-20 minutes. If you prefer a warm slice, pop it in the air fryer for a couple of minutes at 350°F (175°C) for that just-baked goodness. You can also use a toaster if you’ve sliced it! Just keep an eye on it so it doesn’t get too crispy.
With these simple storage and reheating tips, you’ll always have tasty air fryer bread ready to go. Enjoy every bite!
Print
Bread Airfryer Magic: 5 Steps to Perfect Loaf at Home
- Total Time: 35 minutes
- Yield: 1 loaf 1x
- Diet: Vegetarian
Description
Quick and easy air fryer bread recipe.
Ingredients
- 2 cups all-purpose flour
- 1 tablespoon sugar
- 1 teaspoon salt
- 1 tablespoon baking powder
- 1 cup water
Instructions
- Preheat your air fryer to 350°F (175°C).
- In a bowl, mix flour, sugar, salt, and baking powder.
- Add water and stir until a dough forms.
- Shape the dough into a loaf.
- Place the loaf in the air fryer basket.
- Cook for 25 minutes or until golden brown.
- Let it cool before slicing.
Notes
- Adjust cooking time based on your air fryer model.
- Store leftovers in an airtight container.
- Prep Time: 10 minutes
- Cook Time: 25 minutes
- Category: Bread
- Method: Air Frying
- Cuisine: Various
Nutrition
- Serving Size: 1 slice
- Calories: 120
- Sugar: 1g
- Sodium: 200mg
- Fat: 1g
- Saturated Fat: 0g
- Unsaturated Fat: 0g
- Trans Fat: 0g
- Carbohydrates: 24g
- Fiber: 1g
- Protein: 3g
- Cholesterol: 0mg
Keywords: bread airfryer