
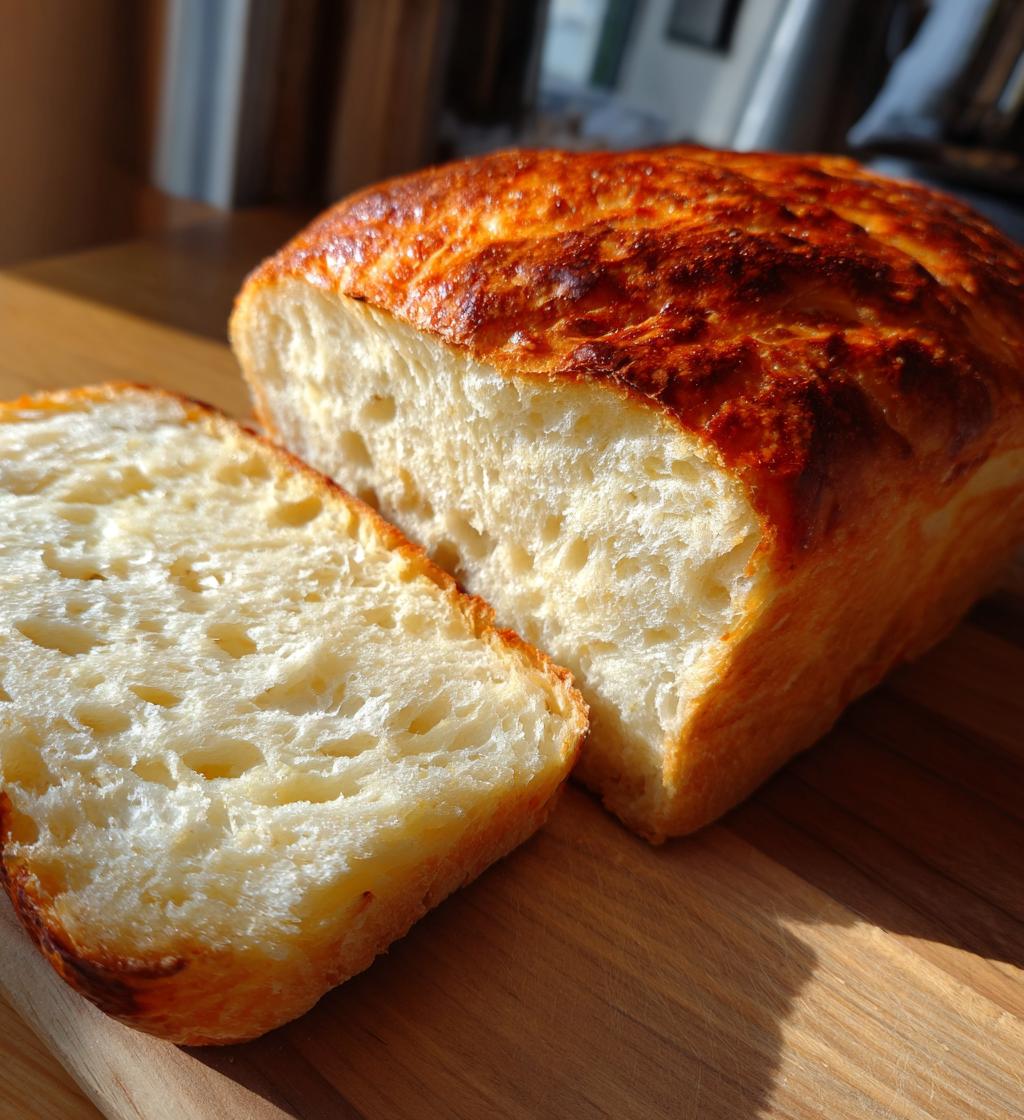
Making brood in de airfryer is one of those magical kitchen moments that makes me feel like a culinary wizard! It’s so simple and efficient; I can whip up a delicious loaf without the fuss of a traditional oven. The air fryer creates that perfect crispy crust while keeping the inside soft and fluffy—just heavenly! I remember the first time I tried it; I was amazed at how quickly it baked and how the aroma filled my kitchen. Trust me, once you try making bread this way, you’ll never want to go back! It’s a game changer for busy cooks like us.
Ingredients List
Gathering the right ingredients is key to making the perfect brood in de airfryer. Here’s what you’ll need:
- 500g flour: All-purpose flour works great here, giving the bread its structure and chewiness.
- 300ml water: It should be lukewarm to help activate the yeast. Just a little warm, not hot!
- 7g yeast: I use dry yeast for convenience, but make sure it’s fresh for the best rise.
- 10g salt: This enhances the flavor of the bread, so don’t skip it! It’s essential.
- 10ml olive oil: A touch of olive oil adds richness and helps keep the bread moist.
How to Prepare Instructions
Now, let’s dive into the process of making your delicious brood in de airfryer! Follow these steps, and I promise you’ll be rewarded with a warm, crusty loaf that you’ll be so proud of!
Preparing the Dough
First things first, grab a large mixing bowl and combine the flour, yeast, and salt. I like to whisk them together to ensure everything is evenly distributed. Then, create a little well in the center and pour in the lukewarm water and olive oil. Wow, the aroma will start to come alive! Now, get your hands in there and start kneading the dough for about 10 minutes. It should become smooth and elastic. If it feels too sticky, don’t be afraid to sprinkle a touch more flour. Just be gentle!
Rising the Dough
Once your dough is kneaded to perfection, it’s time for it to rise! Cover the bowl with a clean kitchen towel and let it sit in a warm place for about 1 hour. This is crucial, as it allows the yeast to work its magic, making the dough puff up beautifully. You’ll know it’s ready when it has doubled in size. Trust me, it’s such a satisfying moment!
Shaping the Dough
After the dough has risen, gently punch it down to release any air bubbles. Then, transfer it to a lightly floured surface. Shape the dough into a loaf by flattening it out slightly and then rolling it tightly. Pinch the seams to seal it well! This helps create that lovely shape and structure. If you want, you can tuck in the ends for a more polished look. It doesn’t have to be perfect—just make it yours!
Cooking the Bread
Next up, preheat your air fryer to 180°C. While it’s warming up, place your beautifully shaped loaf in the air fryer basket. Here’s a little tip: keep an eye on it during cooking! Bake for about 25 minutes, but check halfway through. If you notice it browning too quickly, you can cover it loosely with aluminum foil to prevent burning. When it’s golden brown and sounds hollow when tapped, it’s done! Wow, that smell is going to drive you wild!
Why You’ll Love This Recipe
Okay, let me tell you why making brood in de airfryer is just the best thing ever! Seriously, once you try it, you’ll be singing its praises. Here are some reasons to fall in love with this recipe:
- Quick Preparation: You can whip up this bread in no time! With just a bit of mixing and kneading, you’re on your way to fresh-baked goodness.
- Effortless Execution: The air fryer does all the hard work for you. It’s like having a personal sous-chef—just set the temperature and let it bake!
- Delicious Results: The combination of crispy crust and soft, fluffy interior is unbeatable. Each bite is a little piece of heaven.
- Minimal Cleanup: Fewer bowls and utensils mean less fuss in the kitchen afterward. Yay for easy clean-up!
- Perfect for Small Spaces: If you’re short on kitchen space or don’t have a traditional oven, the air fryer is a game changer for your bread-making adventures.
- Great for Experimenting: Once you master this basic loaf, you can get creative! Add herbs, cheese, or even seeds—let your imagination run wild.
Tips for Success
Alright, let’s make sure your brood in de airfryer turns out absolutely perfect! Here are some pro tips that I’ve picked up along the way to help you avoid any common pitfalls:
- Check Your Yeast: Always make sure your yeast is fresh! If you’re unsure, you can proof it by mixing it with warm water and a pinch of sugar. If it bubbles up, it’s good to go!
- Watch the Dough Consistency: If your dough feels too sticky while kneading, add just a little more flour. But be careful—not too much! You want it to be smooth and elastic, not dry.
- Rising Time is Key: Don’t rush the rising process. If your kitchen is cool, it might take a bit longer than an hour. Just be patient! The more it rises, the fluffier your bread will be.
- Preheat the Air Fryer: Always preheat your air fryer. This ensures even cooking and helps achieve that golden crust. Trust me, it makes a difference!
- Monitor Cooking Time: Every air fryer is a little different, so keep an eye on your bread while it cooks. If it’s browning too fast, cover it loosely with foil to prevent burning. You want that perfect balance!
- Let It Cool: After baking, let your bread cool on a wire rack for at least 10-15 minutes before slicing. This helps set the texture and keeps it from getting gummy.
- Experiment with Flavors: Once you’re comfortable with the basic loaf, don’t hesitate to play around! Adding spices, cheese, or seeds can take your brood to a whole new level.
With these tips, you’ll be well on your way to mastering brood bakken in de airfryer. Happy baking, my friend!
Nutritional Information
Now, I know you’re curious about the nutritional values of this delicious brood in de airfryer! Here’s a rough estimate of what you can expect per 100g serving:
- Calories: 250
- Fat: 5g
- Saturated Fat: 0.5g
- Unsaturated Fat: 4.5g
- Trans Fat: 0g
- Carbohydrates: 50g
- Fiber: 2g
- Protein: 8g
- Sugar: 0g
- Sodium: 400mg
- Cholesterol: 0mg
Keep in mind that these values are just estimates and can vary based on the specific ingredients you use and portion sizes. It’s always a good idea to adjust based on your dietary needs. Enjoy your baking adventure!
FAQ Section
Got questions about brood bakken in de airfryer? Don’t worry, I’ve got you covered! Here are some common queries I’ve encountered along my baking journey, along with answers to help you out:
Can I use whole wheat flour instead of all-purpose flour?
Absolutely! Whole wheat flour can be used, but keep in mind it may change the texture slightly. You might need to add a bit more water to get the right consistency. Just adjust as you go!
What if my dough doesn’t rise?
If your dough isn’t rising, it could be due to inactive yeast. Make sure your yeast is fresh and your water is warm, not hot! Also, give it a cozy spot to rise—like a warm kitchen or a sunny windowsill!
Can I add herbs or cheese to the dough?
Yes, yes, yes! Adding herbs, cheese, or even spices can elevate your bread to a whole new level. Just make sure not to overload the dough—start with small amounts and adjust to your taste!
How do I know when the bread is done?
The best way to check is to tap the bottom of the loaf; it should sound hollow. You can also use a toothpick or skewer—if it comes out clean, you’re golden! Don’t forget that lovely golden color on the crust!
Can I make this bread ahead of time?
Sure! You can make the dough ahead of time and refrigerate it after kneading. Just let it come to room temperature before shaping and baking. It can also be frozen after shaping, then baked straight from the freezer—just add a few extra minutes to the cooking time!
What should I do if my bread is too dense?
A dense loaf could be from over-kneading or not enough rising time. Make sure to knead just until smooth and elastic. If you think it could use more rise, let it sit a bit longer before baking!
Can I use a different air fryer model?
Absolutely! Just keep in mind that cooking times may vary a little depending on your air fryer. It’s a good idea to keep an eye on the bread as it cooks to adjust the timing as needed.
Hopefully, these answers help clear up any confusion and boost your confidence in making scrumptious brood in de airfryer! Happy baking!
Storage & Reheating Instructions
Let’s talk about how to keep your delicious brood in de airfryer fresh and tasty! Proper storage is key to enjoying that homemade goodness for days to come. Here’s how I do it:
First off, once your bread has completely cooled (trust me, this step is super important!), wrap it tightly in plastic wrap or place it in an airtight container. This helps keep that lovely crust crispy while preventing it from drying out. You can store it at room temperature for about 2-3 days, but if you want to keep it longer, pop it in the fridge! Just remember, refrigeration can sometimes change the texture a bit, making it a little denser.
If you’ve got leftovers and want to save them for a longer period, I highly recommend freezing. Slice your loaf into pieces and wrap each slice individually in plastic wrap, then place them in a freezer bag. This way, you can grab just what you need without thawing the entire loaf. It’ll stay good in the freezer for about 2-3 months.
Now, when it’s time to enjoy that lovely bread again, you’ve got a couple of options! If you’re reheating slices, just pop them in the air fryer at 160°C for about 3-5 minutes. This will bring back that wonderful crust and warm the inside perfectly. Alternatively, you can toast them in a regular toaster if you prefer! If you’re reheating a whole loaf, wrap it in foil and bake it in the air fryer at 160°C for about 10-15 minutes. Just keep an eye on it to make sure it doesn’t get too brown.
With these storage and reheating tips, you’ll always have fresh-tasting brood at your fingertips. Enjoy every last bite!
Print
Brood bakken in de airfryer: 5 Tips for Perfect Loaves
- Total Time: 1 hour 35 minutes
- Yield: 1 loaf 1x
- Diet: Vegetarian
Description
A simple guide to making brood in an air fryer.
Ingredients
- 500g flour
- 300ml water
- 7g yeast
- 10g salt
- 10ml olive oil
Instructions
- Mix flour, yeast, and salt in a bowl.
- Add water and olive oil.
- Knead the dough for 10 minutes.
- Let the dough rise for 1 hour.
- Shape the dough into a loaf.
- Preheat the air fryer to 180°C.
- Place the loaf in the air fryer basket.
- Cook for 25 minutes.
Notes
- Check the bread halfway through cooking.
- Adjust cooking time for different sizes of loaves.
- Prep Time: 10 minutes
- Cook Time: 25 minutes
- Category: Bread
- Method: Air Frying
- Cuisine: Dutch
Nutrition
- Serving Size: 100g
- Calories: 250
- Sugar: 0g
- Sodium: 400mg
- Fat: 5g
- Saturated Fat: 0.5g
- Unsaturated Fat: 4.5g
- Trans Fat: 0g
- Carbohydrates: 50g
- Fiber: 2g
- Protein: 8g
- Cholesterol: 0mg
Keywords: brood bakken in de airfryer