
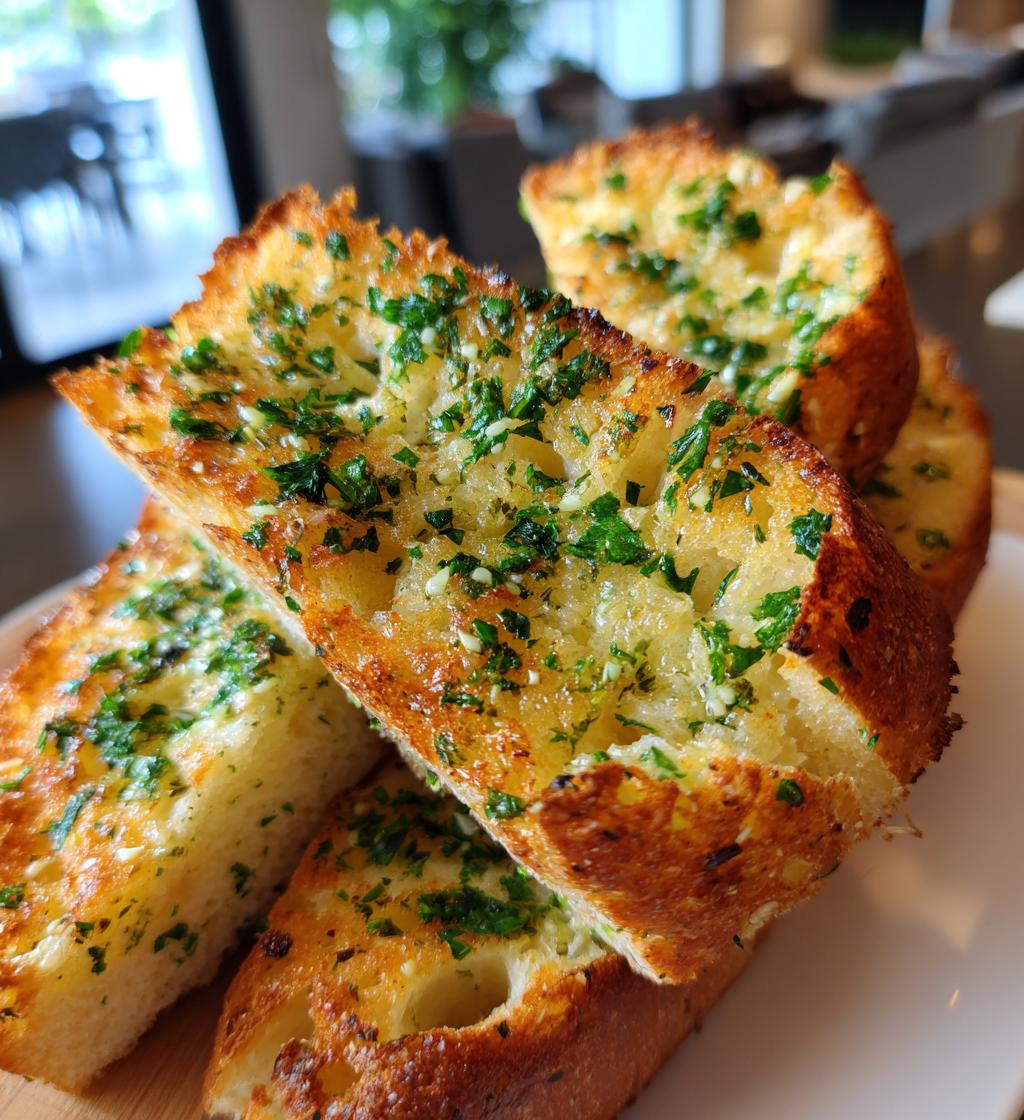
Oh my goodness, let me tell you about the magic of making garlic bread in an air fryer! Seriously, this method is a game changer. It’s so easy and quick that you’ll wonder why you ever made it any other way. Picture this: you’re just a few minutes away from biting into warm, crusty bread slathered in a luscious garlic butter mixture that’s bursting with flavor. Yum!
One of my favorite parts about using the air fryer is how it perfectly toasts the bread, giving you that delightful crispness on the outside while keeping the inside soft and fluffy. Plus, it cuts down on cooking time, so you can whip up this delicious side dish in no time at all. Trust me, once you try this method, you’ll never go back to the oven!
Whether you’re serving it alongside pasta, soup, or just enjoying it as a snack, this garlic bread is sure to impress. So, let’s dive into the details and get started on this scrumptious treat!
Ingredients for Garlic Bread in Airfryer
Gathering the right ingredients is super important for making that perfect garlic bread in the air fryer. Here’s what you’ll need:
- 1 loaf of French bread: Look for a nice, fresh loaf – it’s got to have that crispy crust and soft inside for the perfect bite!
- 1/2 cup unsalted butter, softened: This is what makes your garlic bread rich and creamy. Just let it sit out for a bit to soften up so it spreads easily.
- 4 cloves garlic, minced: You can adjust this to your taste, but trust me, the more garlic, the better! Minced really helps to release all that delicious flavor.
- 1/4 cup fresh parsley, chopped: This adds a pop of color and freshness! If you love herbs, feel free to toss in a bit more.
- 1/2 teaspoon salt: Just a pinch to enhance all those wonderful flavors – it really ties everything together.
That’s it! Simple, fresh ingredients that come together to create something truly scrumptious. Now, let’s get ready to whip it all up!
How to Prepare Garlic Bread in Airfryer
Now that we’ve got our ingredients ready, let’s dive into how to prepare this mouthwatering garlic bread. It’s super simple and oh-so-rewarding! Just follow these steps, and you’ll be on your way to garlic bread heaven in no time.
Preheat the Air Fryer
The first thing you want to do is preheat your air fryer to 350°F (175°C). Preheating is key because it helps get that nice crispiness on the bread right from the start. You’ll be amazed at how evenly everything cooks when you do this!
Prepare the Garlic Butter Mixture
In a mixing bowl, combine your softened butter, minced garlic, chopped parsley, and salt. I like to use a fork or a spatula to mix everything together until it’s nice and smooth. The goal is to evenly distribute that garlicky goodness for maximum flavor in every bite. Trust me, the aroma of this mixture alone is enough to get your taste buds tingling!
Slice the French Bread
Next, grab your loaf of French bread and slice it in half lengthwise. This helps to create a nice flat surface for spreading the garlic butter. Make sure to cut straight down the middle to keep those halves even – you want both pieces to soak up that delicious flavor!
Spread the Mixture
Now, it’s time to spread that heavenly garlic butter mixture generously on both halves of the bread. Don’t be shy here! Make sure you cover every inch to ensure each bite is bursting with flavor. I like to use a butter knife or even the back of a spoon to get an even layer.
Cook in the Air Fryer
Place the bread halves in the air fryer basket, making sure they’re not overcrowded. Cook them for about 5-7 minutes, checking for that perfect golden-brown color. You’ll know they’re done when they’re crispy on the outside and the aroma fills your kitchen – it’s pure bliss!
Cool and Serve
Once they’re out of the air fryer, let the bread cool slightly before slicing it into individual pieces. This step is crucial because it gives the butter a moment to set, preventing it from sliding off when you cut it. Serve warm for the best experience, and watch everyone devour it in seconds!
Nutritional Information for Garlic Bread in Airfryer
Let’s talk numbers! Here’s a quick breakdown of the nutritional information for each slice of this scrumptious garlic bread. Keep in mind that these values are estimates, but they’ll give you a good idea of what you’re indulging in:
- Calories: 200
- Fat: 15g
- Saturated Fat: 9g
- Unsaturated Fat: 4g
- Trans Fat: 0g
- Cholesterol: 30mg
- Sodium: 300mg
- Carbohydrates: 20g
- Fiber: 1g
- Sugar: 1g
- Protein: 2g
So, there you have it! This garlic bread is indulgent yet oh-so-delicious. It’s perfect as a side dish or a snack, and you can enjoy it guilt-free knowing the numbers behind it. Just remember, moderation is key, especially when it’s this tasty!
Why You’ll Love This Recipe
- Quick Preparation: This garlic bread in the air fryer comes together in just 10 minutes of prep time and only 7 minutes of cooking. You’ll have warm, delicious garlic bread ready before you know it!
- Easy Cleanup: With minimal dishes to wash, you can enjoy your meal and relax afterward. Just one mixing bowl and the air fryer to clean – it’s a dream!
- Delicious Flavor: The combination of buttery goodness and fresh garlic is absolutely irresistible. Each bite is rich and savory, making it a fantastic side for any meal.
- Perfect Texture: The air fryer gives you that delightful crispy exterior while keeping the inside soft and fluffy. It’s the best of both worlds!
- Customizable: You can easily adjust the garlic and herbs to suit your taste. Want it extra garlicky or a little herby? Go for it!
- Impressive Presentation: Serve it warm, and watch your friends and family rave about this beautiful, golden-brown garlic bread. It’s a showstopper!
Tips for Success with Garlic Bread in Airfryer
Alright, let’s make sure your garlic bread in the air fryer turns out absolutely perfect! Here are some of my favorite pro tips that’ll help you achieve the best results:
- Adjust the Garlic: If you love garlic (like I do!), feel free to add a bit more than the recipe calls for. But if you’re not a huge fan, start with 2 cloves and work your way up. Remember, you can always add but you can’t take away!
- Use Fresh Ingredients: Fresh garlic and parsley make a world of difference in flavor. If you can, choose fresh over dried – your taste buds will thank you!
- Don’t Overcrowd the Basket: Make sure to give those bread halves some space in the air fryer. Overcrowding can lead to uneven cooking, so keep them separated for that perfect golden-brown finish.
- Keep an Eye on It: Air fryers can cook differently, so keep an eye on your garlic bread as it cooks. It can go from golden to burnt in a blink, so check it a minute or two before the timer goes off!
- Experiment with Spices: Want to jazz it up? Try adding a pinch of red pepper flakes for some heat or a sprinkle of Italian seasoning for a flavor boost. You can customize it to your liking!
- Let It Rest: After cooking, let your garlic bread cool for a couple of minutes before slicing. This allows the butter to set and prevents it from sliding off. Patience is key for that perfect serving!
With these tips, you’ll be well on your way to creating the most delicious, satisfying garlic bread that’ll wow everyone at the table. Enjoy every garlicky bite!
Variations of Garlic Bread in Airfryer
Now that you’ve mastered the classic garlic bread in the air fryer, let’s have some fun with variations! The beauty of this recipe is its versatility, so don’t be afraid to get creative. Here are some delicious ideas to take your garlic bread to the next level:
- Cheesy Garlic Bread: Who doesn’t love cheese? Add a generous layer of shredded mozzarella or parmesan on top of the garlic butter before air frying. It’ll melt into a gooey, cheesy delight that’s simply irresistible!
- Herb-Infused Garlic Bread: Switch up the parsley for other fresh herbs like basil, oregano, or thyme. Each herb brings its unique flavor, giving your garlic bread a whole new twist!
- Spicy Garlic Bread: If you like a bit of heat, sprinkle some red pepper flakes over the garlic butter before cooking. It adds a nice kick that pairs wonderfully with the rich flavors.
- Pesto Garlic Bread: Swap out some of the garlic butter for a couple of tablespoons of pesto. The basil and garlic combo will elevate your garlic bread to gourmet status!
- Garlic Breadsticks: Instead of slicing the bread in half, cut the loaf into individual sticks. Spread the garlic butter on each stick and air fry until golden. Perfect for dipping into marinara sauce!
- Sweet Garlic Bread: For a unique twist, try adding a touch of honey or balsamic glaze on top of the garlic butter before cooking. It creates an unexpected sweet-savory flavor that’s delightful!
These variations are just the beginning! Feel free to experiment with your favorite flavors and ingredients. The possibilities are endless, and I can’t wait to hear what delicious combinations you come up with. Happy cooking!
Storage & Reheating Instructions
If you happen to have any leftover garlic bread (which is a rarity in my house, but just in case!), storing it properly is key to keeping it delicious! Here’s how to do it:
- Storing Leftovers: Let your garlic bread cool completely before storing it. This prevents condensation from forming in the container, which can make the bread soggy. Wrap the bread tightly in plastic wrap or aluminum foil, or place it in an airtight container. It’ll stay fresh for about 2-3 days at room temperature.
- For Longer Storage: If you want to keep it for a longer period, I recommend freezing it. Wrap the garlic bread in plastic wrap and then place it in a freezer-safe bag. It can be frozen for up to 2 months. Just be sure to label it with the date so you know when it was made!
Now, let’s talk about reheating so you can enjoy that crispy goodness again:
- Reheating in the Air Fryer: The air fryer is perfect for bringing your garlic bread back to life! Preheat it to 350°F (175°C), then place the bread in the basket for about 3-5 minutes until it’s warmed through and crispy again. Keep an eye on it to avoid overcooking!
- Reheating in the Oven: If you prefer the oven, preheat it to 350°F (175°C) as well. Wrap the garlic bread in foil to keep it from drying out and bake for about 10 minutes. Unwrap it for the last couple of minutes to let the top crisp up.
- Microwave (not recommended): I wouldn’t recommend using the microwave if you can avoid it, as it tends to make the bread chewy instead of crispy. But if you’re in a pinch, just heat it in short bursts of 10-15 seconds until warmed through.
With these storage and reheating tips, you can savor your garlic bread just like it was freshly made. Trust me, there’s nothing quite like that first bite of warm, garlicky goodness all over again!
Leave a Comment or Share Your Experience
I’d absolutely love to hear from you! Have you tried making this garlic bread in the air fryer yet? What did you think? Your feedback means the world to me, and it helps others who are eager to dive into this delicious recipe.
If you’ve got any tips, tricks, or variations that you’ve experimented with, please share those too! Whether you added extra garlic, tried a new herb, or took it up a notch with cheese, I want to know all about it. And don’t forget to rate the recipe! Your experiences can inspire countless other home cooks to enjoy this tasty treat.
So go ahead, drop a comment below and let’s chat about your garlic bread adventures. Happy cooking, and I can’t wait to hear what you’ve created!
Print
Garlic Bread in Airfryer: 5 Steps to Irresistible Bliss
- Total Time: 17 minutes
- Yield: 4 servings 1x
- Diet: Vegetarian
Description
Easy garlic bread made in an air fryer.
Ingredients
- 1 loaf of French bread
- 1/2 cup unsalted butter, softened
- 4 cloves garlic, minced
- 1/4 cup fresh parsley, chopped
- 1/2 teaspoon salt
Instructions
- Preheat your air fryer to 350°F (175°C).
- In a bowl, mix the softened butter, minced garlic, parsley, and salt.
- Slice the French bread in half lengthwise.
- Spread the garlic butter mixture evenly on both halves.
- Place the bread in the air fryer basket.
- Cook for 5-7 minutes or until golden brown.
- Remove from the air fryer and let cool slightly before slicing.
Notes
- Adjust garlic amount to taste.
- Serve warm for best flavor.
- Prep Time: 10 minutes
- Cook Time: 7 minutes
- Category: Side Dish
- Method: Air Fryer
- Cuisine: Italian
Nutrition
- Serving Size: 1 slice
- Calories: 200
- Sugar: 1g
- Sodium: 300mg
- Fat: 15g
- Saturated Fat: 9g
- Unsaturated Fat: 4g
- Trans Fat: 0g
- Carbohydrates: 20g
- Fiber: 1g
- Protein: 2g
- Cholesterol: 30mg
Keywords: garlic bread in airfryer