
Hey there, snack lovers! If you’re anything like me, you know how hard it can be to find a quick, healthy snack that actually tastes good. That’s where my air fryer comes to the rescue! Seriously, it’s like having a magic wand in the kitchen. I can whip up crispy, flavorful snacks without the guilt! These healthy snacks are not just easy to make; they’re packed with flavor and goodness.
One of my fondest memories is standing by the air fryer, waiting for that delightful crunch to signal that my chickpeas are ready. The aroma of spices fills the kitchen, making it nearly impossible to resist! Whether I’m having a movie night or just need something to munch on while I work, these air-fried chickpeas are my go-to. They’re crunchy, perfectly seasoned, and way more satisfying than any bag of chips. Plus, I love knowing I’m fueling my body with something wholesome.
So, let’s dive into this super simple recipe that’s not only delicious but also makes healthy snacking a total breeze!
Ingredients List
Here’s what you’ll need to make these delightful air-fried chickpeas. Trust me, it’s a short list, and you probably have most of these ingredients in your pantry already!
- 1 cup of rinsed and drained chickpeas
- 1 tablespoon of olive oil
- 1 teaspoon of paprika
- 1 teaspoon of garlic powder
- Salt to taste
These simple ingredients come together to create a snack that’s not only healthy but also bursting with flavor. Feel free to get creative with your spices; sometimes I like to add a pinch of cayenne for a kick! It’s all about finding that perfect balance that tickles your taste buds.
How to Prepare Healthy Snacks Airfryer
Alright, let’s get into the nitty-gritty of making these crispy chickpeas! It’s super straightforward, and I promise you’ll be snacking in no time. Just follow these steps, and you’ll be golden!
Preheat the Air Fryer
First things first, preheating your air fryer is crucial! It helps to ensure that your chickpeas cook evenly and get that perfect crunch. Set your air fryer to 400°F (200°C) and let it warm up for about 5 minutes. You’ll want that hot air circulating from the get-go!
Prepare the Chickpeas
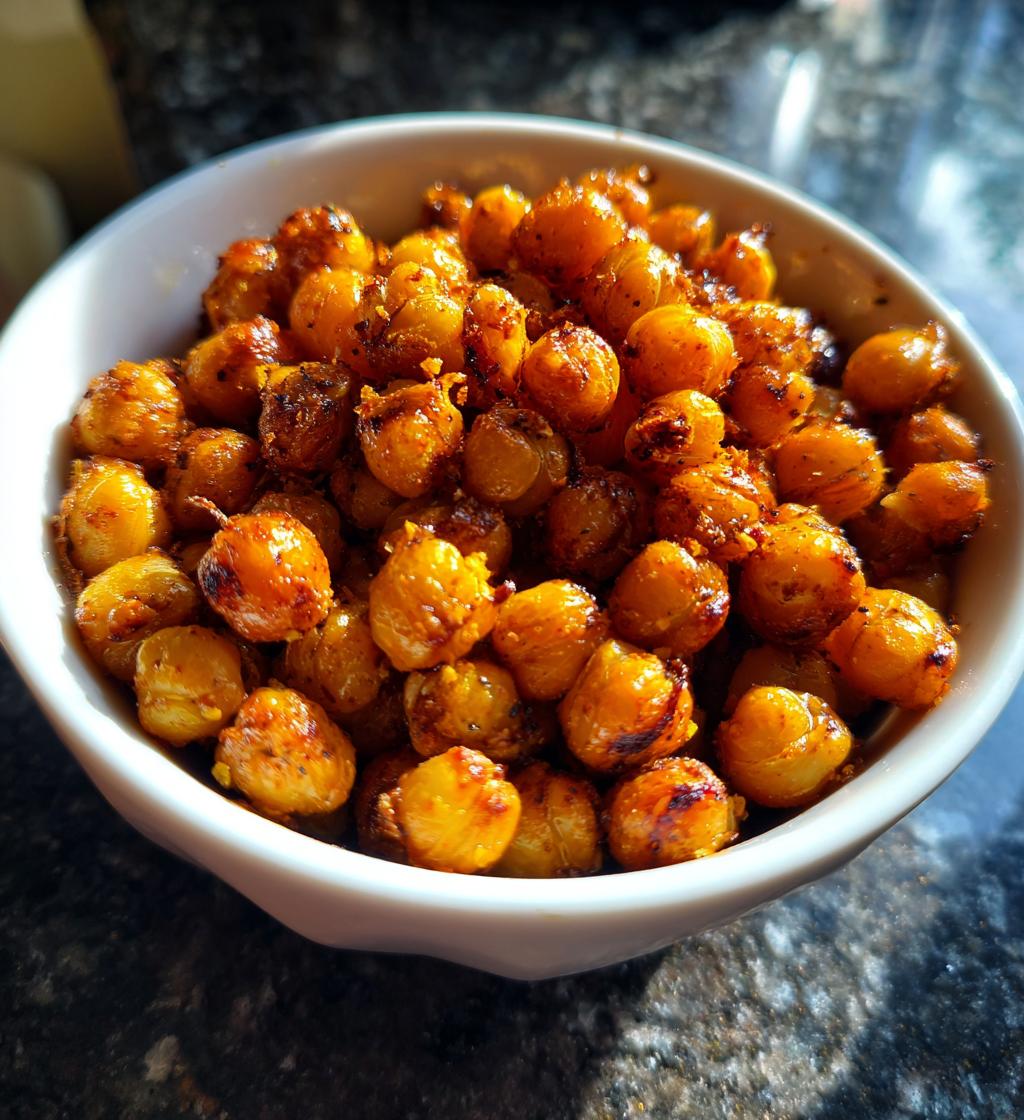
Now, let’s get those chickpeas ready! Start by rinsing and draining 1 cup of chickpeas thoroughly. This is super important because it helps to remove any excess sodium if you’re using canned chickpeas. Once they’re nice and dry, toss them in a bowl with 1 tablespoon of olive oil, 1 teaspoon of paprika, 1 teaspoon of garlic powder, and a sprinkle of salt. Mix it all together until every chickpea is evenly coated – trust me, this is where the flavor magic happens!
Air Fry the Chickpeas
Now for the fun part! Spread the seasoned chickpeas in a single layer in the air fryer basket. It’s important not to overcrowd them; you want that hot air to circulate around each one for maximum crispiness. Cook them for about 15-20 minutes, but don’t forget to shake the basket halfway through! This little shake ensures that they cook evenly and get that golden-brown color all around. When they’re crispy and fragrant, they’re ready to come out. Let them cool for a few minutes before diving in, and oh boy, you’re in for a treat!
Why You’ll Love This Recipe
- Quick and easy to prepare—whip up a batch in just 30 minutes!
- Packed with protein and fiber, making it a nutritious snack choice.
- Flavorful and satisfying, perfect for curbing those afternoon cravings.
- Totally customizable; you can tweak the spices to suit your mood.
- Healthier alternative to traditional chips, with far less oil and fat.
- Great for meal prep; make a big batch and enjoy them throughout the week!
- Kid-friendly! Even picky eaters will love the crunch and flavor.
- Easy cleanup—just toss everything in the air fryer and enjoy!
Tips for Success
To really nail these air-fried chickpeas, I’ve got a few pro tips that will help you achieve snack perfection every time. Trust me, a little attention to detail goes a long way!
- Adjust the Spices: Don’t be afraid to experiment! If you love a little heat, a pinch of cayenne or chili powder can elevate the flavor. On the flip side, if you prefer something milder, stick to just salt and garlic powder. It’s all about your personal taste!
- Check for Doneness: Every air fryer is a bit different, so keep an eye on your chickpeas as they cook. They should be golden brown and crispy. If you notice they’re not quite there at the 15-minute mark, give them a few extra minutes, but be careful not to burn them!
- Even Cooking: Make sure to shake the basket halfway through cooking. This little step is essential for getting that even crispy texture all around. Trust me, you don’t want some chickpeas to be perfectly crunchy while others are still soft!
- Cool Before Serving: Let your chickpeas cool for a few minutes after cooking. This helps them crisp up even more as they cool down. Plus, you won’t burn your mouth when you dive in!
- Batch Cooking: If you’re making a big batch, consider cooking them in smaller portions. This allows for better airflow in the fryer and ensures every single chickpea gets that delightful crunch.
- Storage Tips: If you have leftovers (which is rare!), store them in an airtight container. They can lose their crunch over time, so I recommend enjoying them fresh for the best experience!
With these tips in your back pocket, you’re all set to create the most delicious and satisfying air-fried snacks. Happy cooking!
Nutritional Information
Now, let’s talk numbers! It’s always good to know what’s going into your snacks, especially when they’re this healthy. Here’s the typical nutritional breakdown for one serving of these air-fried chickpeas:
- Calories: 150
- Fat: 6g
- Saturated Fat: 1g
- Unsaturated Fat: 5g
- Trans Fat: 0g
- Carbohydrates: 22g
- Fiber: 6g
- Protein: 6g
- Sugar: 1g
- Sodium: 200mg
- Cholesterol: 0mg
These numbers are estimates, of course, but they give you a solid idea of just how nutritious this snack is. With a lovely balance of protein, fiber, and healthy fats, you can feel good about munching on these crunchy bites. They’ll keep you satisfied without weighing you down, making them the perfect guilt-free snack for any time of day!
FAQ Section
I know you might have some questions about these delicious air-fried chickpeas, so let’s dive into a few of the most common ones! These tidbits will help you get the most out of your healthy snacks adventure.
Can I use canned chickpeas?
Absolutely! Canned chickpeas are super convenient. Just make sure to rinse and drain them well to get rid of excess sodium. It’ll save you time and still give you that fantastic crunch!
What if I don’t have paprika?
No worries! You can totally swap it out for other spices. Smoked paprika adds a lovely depth, but if you don’t have that, try cumin, chili powder, or even a dash of curry powder for a unique twist. Just remember to adjust the amounts to your taste!
How should I store leftovers?
If you’re lucky enough to have leftovers (which I rarely do!), store them in an airtight container at room temperature. Just keep in mind that they might lose some crunch over time. For the best experience, I recommend enjoying them fresh!
Can I make these with other beans or vegetables?
Yes, yes, yes! Feel free to experiment with other beans like black beans or white beans, or even veggies like broccoli or cauliflower. Just adjust the cooking time as needed, since different ingredients will cook at different rates!
How do I reheat them to keep them crispy?
If you want to bring your leftovers back to life, toss them back in the air fryer for a few minutes at 400°F (200°C). This will help restore that delightful crunch! You can also pop them in a preheated oven for a similar effect.
Are these chickpeas really healthy?
Absolutely! They’re packed with protein, fiber, and healthy fats, making them a fantastic snack choice. Plus, they’re low in calories compared to traditional snacks like chips. So, munch away with a happy heart!
Can I make these spicy?
With these answers in mind, you’re all set to tackle any questions that pop up while making these delicious air-fried chickpeas. Happy snacking!
Storage & Reheating Instructions
Let’s talk about how to keep those crispy chickpeas fresh for as long as possible! Storing them properly is key to maintaining that delightful crunch, so here’s what I do:
- Storing Leftovers: If you happen to have any leftover chickpeas (which is rare in my house!), let them cool completely first. Once cooled, transfer them to an airtight container. This will keep them from getting soggy. Ideally, consume them within 2-3 days for the best texture!
- Reheating Tips: If you want to bring the crunch back to your leftovers, just pop them back into the air fryer! Set it to 400°F (200°C) and reheat for about 3-5 minutes. This will make them crispy again without losing any flavor. Alternatively, you can reheat them in a preheated oven for a similar effect.
Remember, the sooner you enjoy them, the better! Freshly air-fried chickpeas are truly unbeatable, but with these storage and reheating tips, you can savor that flavor longer. Happy snacking!
Print
Healthy Snacks Airfryer: 7 Guilt-Free Treats to Love
- Total Time: 30 minutes
- Yield: 2 servings 1x
- Diet: Vegan
Description
Healthy snacks made in an air fryer.
Ingredients
- 1 cup of chickpeas
- 1 tablespoon olive oil
- 1 teaspoon paprika
- 1 teaspoon garlic powder
- Salt to taste
Instructions
- Preheat the air fryer to 400°F (200°C).
- Rinse and drain the chickpeas.
- Toss chickpeas with olive oil, paprika, garlic powder, and salt.
- Spread chickpeas in a single layer in the air fryer basket.
- Cook for 15-20 minutes, shaking the basket halfway through.
- Remove when crispy and allow to cool before serving.
Notes
- Adjust spices to your taste.
- Store leftovers in an airtight container.
- Can use other beans or vegetables for variety.
- Prep Time: 10 minutes
- Cook Time: 20 minutes
- Category: Snacks
- Method: Air Frying
- Cuisine: Healthy
Nutrition
- Serving Size: 1 serving
- Calories: 150
- Sugar: 1g
- Sodium: 200mg
- Fat: 6g
- Saturated Fat: 1g
- Unsaturated Fat: 5g
- Trans Fat: 0g
- Carbohydrates: 22g
- Fiber: 6g
- Protein: 6g
- Cholesterol: 0mg
Keywords: healthy snacks airfryer